Basics
Bleeding Control: How to Save a Life in Minutes
May 15, 2025
Massive bleeding is the leading cause of death in trauma. Severe hemorrhage can kill in less than three minutes — many casualties die before medics or rescuers arrive.
But it doesn’t have to be this way.
Learn how to stop the bleed — it’s simpler than you might think, but it takes practice and a bit of your time. A saved life is worth it, every single time.
Signs of Life-Threatening Bleeding
A pool or rapidly growing stain of blood; clothing soaked through.
Blood spurting or flowing in pulses from a wound.
Traumatic amputation of a limb.
Signs of shock: casualty is losing consciousness, pale, weak, and cold.
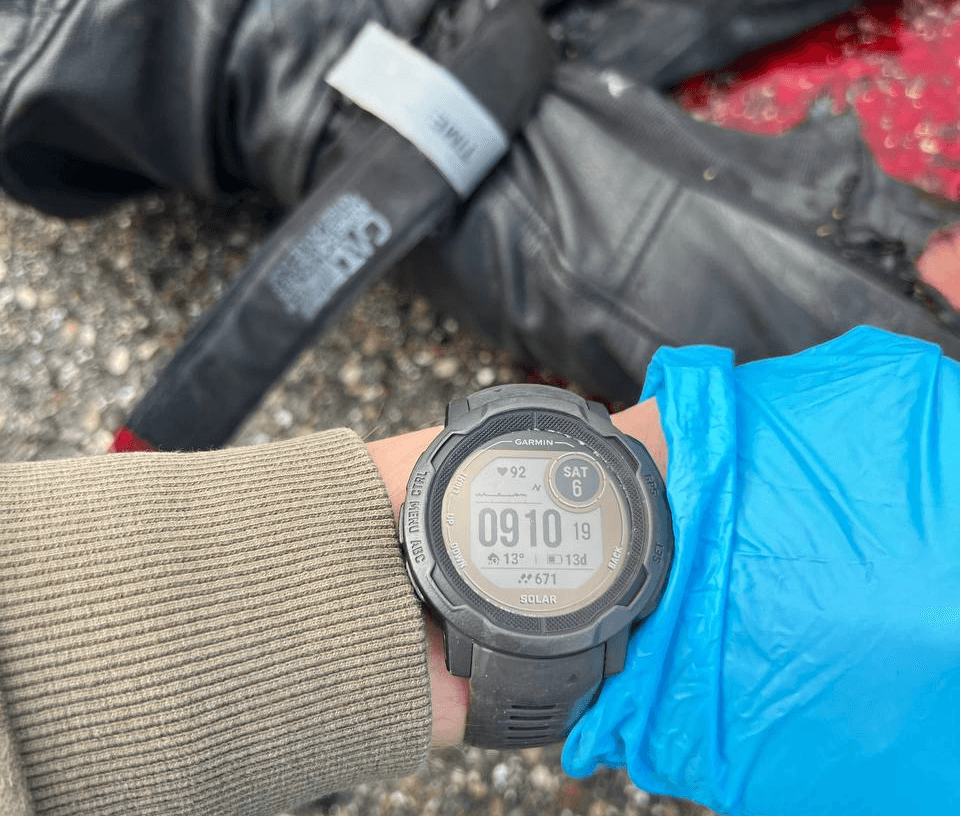
Watch a short video on the basics of bleeding control
Your Own Safety Comes First
Make sure you’re safe. If the area is dangerous, stay under cover. Assess the situation and your abilities. Move the casualty to safety only if it’s possible without risking yourself.
You can also direct the casualty to move to cover on their own and, if possible, provide self-aid. If they are confused, you may need to shout clear, simple commands.
Wear quality nitrile or rubber medical gloves in your size. Keep a pair with you at all times. Avoid gloves that tear easily — such as thin plastic, vinyl, or latex gloves.
Cover exposed skin with clothing. Protect your face from blood splashes with a mask, scarf, goggles, or helmet visor.
If someone else’s blood gets on your skin, wash it off as soon as possible and seek medical advice.
Call for Help
Tell someone nearby to call emergency services, or use your phone on speaker mode so you can continue giving aid with both hands free.

Find the Source of Bleeding
If clothing or other factors prevent you from clearly seeing the wound, cut or tear the clothing away to expose it. Trauma shears are ideal for this and should be part of every first aid kit.
Remember:
There may be more than one wound.
Darkness, sand, gravel, grass, or water can hide blood and make the loss seem smaller than it is.
Watch a TCCC blood sweep demonstration
Direct Pressure
Massive bleeding can often be stopped by pressing firmly on the wound. Place your hands directly on the source of bleeding, using gloves or a barrier to protect yourself.
Apply a bandage or clean cloth to the wound and press hard. Maintain pressure until medics arrive.
Direct pressure works well for extremities, as well as neck, groin, armpit, or buttock wounds.
Do not press on penetrating head wounds. Direct pressure is also unlikely to help with internal bleeding inside the chest or abdomen.
Direct pressure can also be a temporary method while preparing a tourniquet or wound packing.
Direct the casualty to apply pressure to the source of bleeding themselves while you prepare — putting on gloves, locating your first aid kit, cutting away clothing, and so on.
Wound Packing
If direct pressure isn’t enough — especially for large or deep wounds, or when you can’t stay with the casualty — wound packing with a hemostatic dressing is often more effective:
Pack the wound tightly with a CoTCCC-recommended hemostatic dressing, then maintain pressure on top.
If no hemostatic dressing is available, use standard gauze or clean cloth.
If trained, you can replace hand pressure with a pressure bandage — but keep in mind that hands-on pressure is more reliable in holding the packing in place.
Wound packing is most effective for junctional areas (neck, armpits, groin, buttocks) but can also be used on limbs.
Do not pack penetrating wounds to the head, chest, abdomen, natural openings, eyes, or ears.
Watch a TCCC wound packing tutorial
List of CoTCCC-recommended hemostatic dressings

Limb Tourniquets
Massive bleeding from arms or legs can also be stopped with a tourniquet:
Use only high-quality tourniquets recommended by the Committee on TCCC.
Do not use improvised devices — do everything you can to have a proper tourniquet in your kit.
List of CoTCCC-approved tourniquets
Apply the tourniquet at least 5–8 cm (2–3 inches) above the wound. If the exact location of the wound is not clear, place the tourniquet as high as possible on the limb. Do not apply a tourniquet over joints, objects in pockets, knee/elbow pads, or other gear.
It’s best to learn proper tourniquet use in hands-on training.
Tourniquet application technique:
Place the tourniquet 5–8 cm (2–3 inches) above the wound, or as high as possible if the wound site is unclear.
Tighten the strap as much as possible and secure it.
Twist the windlass until the bleeding stops.
Secure the windlass and strap firmly in place.
Confirm that there is no pulse below the tourniquet.
Record the application time on the tourniquet and also write it on the casualty’s forehead with an indelible marker.
Monitoring and Control
Remember that any any treatment used to stop bleeding can fail — especially if the casualty is moved, carried, rolled over, or transported in a vehicle.
Check the casualty frequently until help arrives.
Inspect all wound packs, bandages, and tourniquets often.
If bleeding starts again, act immediately to stop it.
Make sure you get the opportunity to attend practical training — it’s the only way to build real skills and muscle memory.
Train Before You Need It
Skills like these need hands-on practice to build muscle memory.
"In a critical moment, you won’t rise to your expectations — you will fall to the level of your training."
About the Author

Sava — Instructor in first aid and tactical medicine since 2017. Certified in TCCC ASM, CLS, CMC (NAEMT); BLS, PBLS, BIC (ERC); and Stop the Bleed (American College of Surgeons). Has trained more than 10,000 people. Advocate for making lifesaving skills accessible to everyone through tools like LifesaverSIM.
" height="25.043499999999998px" id="bZaRsb3QH" transform="translate(0 19.479)" width="64px"/><path d="M 30.01 0 C 16.251 0 4.521 8.684 0 20.87 L 60.019 20.87 C 55.498 8.684 43.768 0 30.01 0 Z" fill="rgb(0, 82, 180)" height="20.8696px" id="Zt_m72Rz0" transform="translate(1.99 0)" width="60.01937px"/><path d="M 60.019 0 L 0 0 C 4.521 12.186 16.251 20.87 30.01 20.87 C 43.768 20.87 55.498 12.186 60.019 0 Z" fill="rgb(240, 240, 240)" height="20.869600000000005px" id="ty9bVodzh" transform="translate(1.99 43.131)" width="60.019270000000006px"/></g></svg>)
" height="64px" id="UhbRhPCBj" width="64px"/><path d="M 0 32 C 0 14.327 14.327 0 32 0 C 49.673 0 64 14.327 64 32" fill="rgb(51, 138, 243)" height="32px" id="P8IEUt6UR" width="64px"/></g></svg>)
" height="47.75px" id="pJu5XbUJZ" transform="translate(1.125 1.125)" width="166.375px"/><path d="M 162.75 50 L 5.875 50 C 2.625 50 0 47.375 0 44.125 L 0 5.875 C 0 2.625 2.625 0 5.875 0 L 162.75 0 C 166 0 168.625 2.625 168.625 5.875 L 168.625 44 C 168.625 47.375 166 50 162.75 50 Z" fill="rgb(255, 255, 255)" height="50px" id="rzQvGBvst" width="168.625px"/><path d="M 166.375 43 C 166.375 45.625 164.25 47.75 161.625 47.75 L 4.75 47.75 C 2.125 47.75 0 45.625 0 43 L 0 4.75 C 0 2.125 2.125 0 4.75 0 L 161.625 0 C 164.25 0 166.375 2.125 166.375 4.75 Z" fill="rgb(0, 0, 0)" height="47.75px" id="flb8LYmcJ" transform="translate(1.125 1.125)" width="166.375px"/><path d="M 21.621 17 C 21.621 13 24.871 11 25.121 10.875 C 23.246 8.125 20.246 7.75 19.246 7.75 C 16.746 7.5 14.371 9.25 13.121 9.25 C 11.871 9.25 9.871 7.75 7.871 7.875 C 5.246 7.875 2.746 9.5 1.371 11.875 C -1.504 16.75 0.621 24 3.371 28 C 4.746 30 6.371 32.125 8.371 32 C 10.371 31.875 11.121 30.75 13.621 30.75 C 15.996 30.75 16.746 32 18.871 32 C 20.996 32 22.371 30 23.746 28.125 C 25.371 25.875 25.996 23.75 25.996 23.625 C 25.871 23.375 21.746 21.75 21.621 17 Z M 17.621 5.125 C 18.746 3.75 19.496 1.875 19.246 0 C 17.621 0.125 15.746 1.125 14.496 2.375 C 13.496 3.5 12.621 5.5 12.871 7.25 C 14.746 7.5 16.496 6.5 17.621 5.125 Z M 51.121 31.625 L 48.246 31.625 L 46.746 26.75 L 41.371 26.75 L 39.871 31.625 L 37.121 31.625 L 42.496 15 L 45.746 15 Z M 46.246 24.75 L 44.871 20.375 C 44.746 19.875 44.496 18.875 43.996 17.25 C 43.871 18 43.621 19 43.246 20.375 L 41.746 24.75 Z M 64.871 25.5 C 64.871 27.5 64.371 29.125 63.246 30.375 C 62.246 31.375 60.996 32 59.496 32 C 57.871 32 56.746 31.375 56.121 30.25 L 56.121 36.5 L 53.496 36.5 L 53.496 23.625 C 53.496 22.375 53.496 21 53.371 19.625 L 55.746 19.625 L 55.871 21.5 C 56.746 20.125 58.121 19.375 59.871 19.375 C 61.246 19.375 62.496 19.875 63.371 21 C 64.371 22.125 64.871 23.625 64.871 25.5 Z M 62.121 25.625 C 62.121 24.5 61.871 23.5 61.371 22.75 C 60.746 22 59.996 21.625 58.996 21.625 C 58.371 21.625 57.746 21.875 57.246 22.25 C 56.746 22.75 56.371 23.25 56.246 24 C 56.121 24.375 56.121 24.625 56.121 24.75 L 56.121 26.75 C 56.121 27.625 56.371 28.375 56.871 29 C 57.371 29.625 58.121 29.875 58.996 29.875 C 59.996 29.875 60.746 29.5 61.371 28.75 C 61.871 27.875 62.121 26.875 62.121 25.625 Z M 78.621 25.5 C 78.621 27.5 78.121 29.125 76.996 30.375 C 75.996 31.375 74.746 32 73.246 32 C 71.621 32 70.496 31.375 69.871 30.25 L 69.871 36.5 L 67.246 36.5 L 67.246 23.625 C 67.246 22.375 67.246 21 67.121 19.625 L 69.496 19.625 L 69.621 21.5 C 70.496 20.125 71.871 19.375 73.621 19.375 C 74.996 19.375 76.246 19.875 77.121 21 C 78.121 22.125 78.621 23.625 78.621 25.5 Z M 75.871 25.625 C 75.871 24.5 75.621 23.5 75.121 22.75 C 74.496 22 73.746 21.625 72.746 21.625 C 72.121 21.625 71.496 21.875 70.996 22.25 C 70.496 22.75 70.121 23.25 69.996 24 C 69.871 24.375 69.871 24.625 69.871 24.75 L 69.871 26.75 C 69.871 27.625 70.121 28.375 70.621 29 C 71.121 29.625 71.871 29.875 72.746 29.875 C 73.746 29.875 74.496 29.5 75.121 28.75 C 75.621 27.875 75.871 26.875 75.871 25.625 Z M 93.996 27 C 93.996 28.375 93.496 29.625 92.496 30.5 C 91.371 31.5 89.871 32 87.996 32 C 86.246 32 84.746 31.625 83.746 31 L 84.371 28.75 C 85.496 29.5 86.871 29.75 88.246 29.75 C 89.246 29.75 89.996 29.5 90.621 29.125 C 91.121 28.625 91.496 28.125 91.496 27.25 C 91.496 26.625 91.246 26 90.746 25.5 C 90.246 25 89.496 24.625 88.496 24.25 C 85.621 23.125 84.121 21.625 84.121 19.5 C 84.121 18.125 84.621 17 85.621 16.125 C 86.621 15.25 87.996 14.875 89.746 14.875 C 91.246 14.875 92.496 15.125 93.496 15.625 L 92.746 17.75 C 91.746 17.25 90.746 17 89.496 17 C 88.496 17 87.871 17.25 87.246 17.75 C 86.746 18.125 86.621 18.625 86.621 19.25 C 86.621 19.875 86.871 20.5 87.371 20.875 C 87.871 21.25 88.621 21.75 89.746 22.125 C 91.121 22.75 92.246 23.375 92.871 24.125 C 93.746 24.875 93.996 25.875 93.996 27 Z M 102.871 21.625 L 99.996 21.625 L 99.996 27.5 C 99.996 29 100.496 29.75 101.496 29.75 C 101.996 29.75 102.371 29.75 102.621 29.625 L 102.746 31.625 C 102.246 31.875 101.496 31.875 100.621 31.875 C 99.621 31.875 98.746 31.5 98.121 30.875 C 97.496 30.25 97.246 29.125 97.246 27.625 L 97.246 21.625 L 95.496 21.625 L 95.496 19.625 L 97.246 19.625 L 97.246 17.375 L 99.871 16.625 L 99.871 19.625 L 102.746 19.625 C 102.871 19.625 102.871 21.625 102.871 21.625 Z M 116.121 25.5 C 116.121 27.375 115.621 28.875 114.496 30 C 113.371 31.25 111.871 31.875 110.121 31.875 C 108.371 31.875 106.996 31.25 105.871 30.125 C 104.871 29 104.246 27.5 104.246 25.75 C 104.246 23.875 104.746 22.375 105.871 21.125 C 106.996 20 108.371 19.375 110.246 19.375 C 111.996 19.375 113.371 20 114.496 21.125 C 115.621 22.25 116.121 23.75 116.121 25.5 Z M 113.371 25.625 C 113.371 24.5 113.121 23.625 112.621 22.75 C 112.121 21.75 111.246 21.375 110.246 21.375 C 109.121 21.375 108.371 21.875 107.746 22.75 C 107.246 23.5 106.996 24.5 106.996 25.625 C 106.996 26.75 107.246 27.625 107.746 28.5 C 108.371 29.5 109.121 29.875 110.121 29.875 C 111.121 29.875 111.996 29.375 112.496 28.375 C 113.121 27.625 113.371 26.75 113.371 25.625 Z M 124.746 22 C 124.496 22 124.246 21.875 123.871 21.875 C 122.871 21.875 122.246 22.25 121.746 23 C 121.246 23.625 121.121 24.375 121.121 25.375 L 121.121 31.625 L 118.496 31.625 L 118.496 23.375 C 118.496 22 118.496 20.75 118.371 19.625 L 120.746 19.625 L 120.871 21.875 L 120.996 21.875 C 121.246 21.125 121.746 20.5 122.371 20 C 122.996 19.625 123.621 19.375 124.246 19.375 L 124.871 19.375 Z M 136.746 25.125 C 136.746 25.625 136.746 26 136.621 26.375 L 128.621 26.375 C 128.621 27.5 128.996 28.5 129.746 29.125 C 130.371 29.625 131.246 30 132.371 30 C 133.496 30 134.621 29.875 135.621 29.375 L 135.996 31.25 C 134.871 31.75 133.496 32 131.996 32 C 130.121 32 128.621 31.5 127.621 30.375 C 126.621 29.25 125.996 27.75 125.996 26 C 125.996 24.25 126.496 22.625 127.496 21.5 C 128.496 20.25 129.871 19.625 131.746 19.625 C 133.496 19.625 134.746 20.25 135.621 21.5 C 136.371 22.25 136.746 23.625 136.746 25.125 Z M 134.121 24.375 C 134.121 23.625 133.996 22.875 133.621 22.375 C 133.121 21.625 132.496 21.25 131.496 21.25 C 130.621 21.25 129.871 21.625 129.371 22.375 C 128.871 23 128.621 23.625 128.621 24.5 Z M 44.871 8.999 L 43.496 8.999 L 42.746 6.624 L 40.121 6.624 L 39.371 8.999 L 37.996 8.999 L 40.621 0.874 L 42.246 0.874 Z M 42.496 5.624 L 41.871 3.499 C 41.746 3.249 41.621 2.749 41.496 1.999 C 41.371 2.249 41.246 2.874 40.996 3.499 L 40.371 5.624 Z M 51.496 3.124 L 49.246 8.999 L 47.996 8.999 L 45.871 3.124 L 47.246 3.124 L 48.246 6.249 C 48.371 6.749 48.621 7.249 48.621 7.749 C 48.746 7.374 48.871 6.874 48.996 6.249 L 49.996 3.124 Z M 56.246 8.999 L 56.121 8.374 C 55.746 8.874 55.121 9.124 54.371 9.124 C 53.371 9.124 52.621 8.374 52.621 7.374 C 52.621 5.874 53.871 5.124 56.121 5.124 L 56.121 4.999 C 56.121 4.249 55.746 3.874 54.871 3.874 C 54.246 3.874 53.746 3.999 53.371 4.374 L 52.996 3.499 C 53.496 3.124 54.246 2.999 54.996 2.999 C 56.496 2.999 57.371 3.749 57.371 5.499 L 57.371 7.624 C 57.371 8.249 57.371 8.624 57.496 8.999 Z M 56.121 6.124 C 54.621 6.124 53.996 6.499 53.996 7.374 C 53.996 7.999 54.371 8.249 54.871 8.249 C 55.496 8.249 56.121 7.749 56.121 6.999 Z M 60.246 2.124 C 59.871 2.124 59.496 1.749 59.496 1.374 C 59.496 0.999 59.871 0.624 60.246 0.624 C 60.746 0.624 61.121 0.999 60.996 1.374 C 61.121 1.874 60.746 2.124 60.246 2.124 Z M 60.996 8.999 L 59.746 8.999 L 59.746 3.124 L 60.996 3.124 Z M 64.621 8.999 L 63.371 8.999 L 63.371 0.499 L 64.621 0.499 Z M 70.121 8.999 L 69.996 8.374 C 69.621 8.874 68.996 9.124 68.246 9.124 C 67.246 9.124 66.496 8.374 66.496 7.374 C 66.496 5.874 67.746 5.124 69.996 5.124 L 69.996 4.999 C 69.996 4.249 69.621 3.874 68.746 3.874 C 68.121 3.874 67.621 3.999 67.246 4.374 L 66.871 3.499 C 67.371 3.124 68.121 2.999 68.871 2.999 C 70.371 2.999 71.246 3.749 71.246 5.499 L 71.246 7.624 C 71.246 8.249 71.246 8.624 71.371 8.999 Z M 69.996 6.124 C 68.496 6.124 67.871 6.499 67.871 7.374 C 67.871 7.999 68.246 8.249 68.746 8.249 C 69.371 8.249 69.996 7.749 69.996 6.999 Z M 76.621 9.124 C 75.746 9.124 75.121 8.749 74.746 8.124 L 74.621 8.999 L 73.496 8.999 L 73.496 0.499 L 74.746 0.499 L 74.746 4.124 C 75.121 3.499 75.746 3.124 76.621 3.124 C 77.996 3.124 78.996 4.374 78.996 6.124 C 79.121 7.874 78.121 9.124 76.621 9.124 Z M 76.246 3.999 C 75.496 3.999 74.746 4.624 74.746 5.624 L 74.746 6.624 C 74.746 7.374 75.371 8.124 76.121 8.124 C 77.121 8.124 77.746 7.374 77.746 5.999 C 77.871 4.874 77.246 3.999 76.246 3.999 Z M 82.371 8.999 L 81.121 8.999 L 81.121 0.499 L 82.371 0.499 Z M 89.496 6.374 L 85.621 6.374 C 85.621 7.499 86.371 8.124 87.496 8.124 C 88.121 8.124 88.621 7.999 89.121 7.874 L 89.371 8.749 C 88.871 8.999 88.121 9.124 87.371 9.124 C 85.496 9.124 84.496 7.999 84.496 6.124 C 84.496 4.374 85.621 2.999 87.246 2.999 C 88.746 2.999 89.746 4.124 89.746 5.749 C 89.621 5.999 89.621 6.249 89.496 6.374 Z M 88.371 5.499 C 88.371 4.624 87.871 3.999 87.121 3.999 C 86.371 3.999 85.746 4.624 85.746 5.499 Z M 97.496 9.124 C 95.746 9.124 94.621 7.874 94.621 6.124 C 94.621 4.249 95.746 2.999 97.496 2.999 C 99.246 2.999 100.371 4.249 100.371 5.999 C 100.371 7.874 99.246 9.124 97.496 9.124 Z M 97.496 3.999 C 96.496 3.999 95.996 4.874 95.996 6.124 C 95.996 7.374 96.621 8.249 97.496 8.249 C 98.371 8.249 98.996 7.249 98.996 6.124 C 99.121 4.874 98.496 3.999 97.496 3.999 Z M 107.496 8.999 L 106.246 8.999 L 106.246 5.624 C 106.246 4.624 105.871 3.999 104.996 3.999 C 104.246 3.999 103.746 4.624 103.746 5.499 L 103.746 8.999 L 102.496 8.999 L 102.496 3.124 L 103.621 3.124 L 103.621 3.999 C 103.996 3.374 104.746 2.999 105.496 2.999 C 106.746 2.999 107.496 3.999 107.496 5.499 Z M 115.996 4.124 L 114.496 4.124 L 114.496 6.999 C 114.496 7.749 114.746 8.124 115.246 8.124 L 115.871 8.124 L 115.871 9.124 C 115.621 9.249 115.246 9.249 114.871 9.249 C 113.871 9.249 113.246 8.624 113.246 7.249 L 113.246 4.124 L 112.371 4.124 L 112.371 3.124 L 113.246 3.124 L 113.246 2.124 L 114.496 1.749 L 114.496 3.249 L 115.996 3.249 Z M 122.996 8.999 L 121.746 8.999 L 121.746 5.624 C 121.746 4.624 121.371 3.999 120.496 3.999 C 119.871 3.999 119.246 4.499 119.246 5.374 L 119.246 8.874 L 117.996 8.874 L 117.996 0.499 L 119.246 0.499 L 119.246 3.999 C 119.621 3.374 120.246 2.999 120.996 2.999 C 122.246 2.999 122.996 3.999 122.996 5.499 Z M 129.621 6.374 L 125.746 6.374 C 125.746 7.499 126.496 8.124 127.621 8.124 C 128.246 8.124 128.746 7.999 129.246 7.874 L 129.496 8.749 C 128.996 8.999 128.246 9.124 127.496 9.124 C 125.621 9.124 124.621 7.999 124.621 6.124 C 124.621 4.374 125.746 2.999 127.371 2.999 C 128.871 2.999 129.871 4.124 129.871 5.749 C 129.746 5.999 129.746 6.249 129.621 6.374 Z M 128.496 5.499 C 128.496 4.624 127.996 3.999 127.246 3.999 C 126.496 3.999 125.871 4.624 125.871 5.499 Z" fill="rgb(255, 255, 255)" height="36.5px" id="Ev0FxF_dY" transform="translate(16.004 7.75)" width="136.7455291748047px"/></g></svg>)
"/><stop offset="1" stop-color="rgb(0, 227, 255)"/></linearGradient><linearGradient id="AHSAx3S8X-145616319-linear-gradient" x1="1" x2="0" y1="0.4974874371859296" y2="0.5025125628140704"><stop offset="0" stop-color="rgb(255, 224, 0)"/><stop offset="1" stop-color="rgb(255, 156, 0)"/></linearGradient><linearGradient id="lT_CwMzJX-145616319-linear-gradient" x1="0.9882320785671188" x2="0.011767921432881245" y1="1" y2="5.551115123125783e-17"><stop offset="0" stop-color="rgb(255, 58, 68)"/><stop offset="1" stop-color="rgb(195, 17, 98)"/></linearGradient><linearGradient id="G8Xc3Q46D-145616319-linear-gradient" x1="0.004718342672867859" x2="0.9952816573271321" y1="1" y2="0"><stop offset="0" stop-color="rgb(50, 160, 113)"/><stop offset="1" stop-color="rgb(0, 240, 118)"/></linearGradient></defs><g d="M 0 0 L 169 0 L 169 50.074 L 0 50.074 Z M 167.748 44.19 C 167.748 46.819 165.62 48.947 162.991 48.947 L 5.884 48.947 C 3.255 48.947 1.127 46.819 1.127 44.19 L 1.127 5.884 C 1.127 3.255 3.255 1.127 5.884 1.127 L 162.991 1.127 C 165.62 1.127 167.748 3.255 167.748 5.884 Z M 162.991 50.074 L 5.884 50.074 C 2.629 50.074 0 47.445 0 44.19 L 0 5.884 C 0 2.629 2.629 0 5.884 0 L 162.991 0 C 166.246 0 168.875 2.629 168.875 5.884 L 168.875 44.065 C 168.875 47.445 166.246 50.074 162.991 50.074 Z M 167.748 44.19 C 167.748 46.819 165.62 48.947 162.991 48.947 L 5.884 48.947 C 3.255 48.947 1.127 46.819 1.127 44.19 L 1.127 5.884 C 1.127 3.255 3.255 1.127 5.884 1.127 L 162.991 1.127 C 165.62 1.127 167.748 3.255 167.748 5.884 Z M 59.746 13.107 C 59.746 14.192 59.433 14.967 58.804 15.586 C 58.02 16.362 57.236 16.671 55.98 16.671 C 54.881 16.671 53.94 16.36 53.156 15.586 C 52.372 14.809 52.058 13.881 52.058 12.794 C 52.058 11.709 52.371 10.778 53.156 10.005 C 53.941 9.229 54.881 8.919 55.98 8.919 C 56.45 8.919 57.078 9.075 57.549 9.23 C 58.02 9.385 58.49 9.693 58.804 10.006 L 58.179 10.624 C 57.707 10.005 56.92 9.694 56.138 9.694 C 55.352 9.694 54.725 10.005 54.096 10.47 C 53.47 11.09 53.157 11.71 53.157 12.64 C 53.157 13.571 53.47 14.192 54.096 14.812 C 54.725 15.432 55.352 15.588 56.137 15.588 C 56.92 15.588 57.707 15.278 58.177 14.812 C 58.49 14.501 58.803 13.883 58.803 13.262 L 56.137 13.262 L 56.137 12.332 L 59.746 12.332 L 59.746 13.108 Z M 65.551 10.006 L 62.098 10.006 L 62.098 12.332 L 65.236 12.332 L 65.236 13.262 L 62.098 13.262 L 62.098 15.587 L 65.551 15.587 L 65.551 16.517 L 61.157 16.517 L 61.157 9.077 L 65.551 9.077 Z M 69.628 16.516 L 68.689 16.516 L 68.689 10.006 L 66.649 10.006 L 66.649 9.076 L 71.826 9.076 L 71.826 10.005 L 69.786 10.005 L 69.786 16.514 L 69.629 16.517 Z M 75.434 16.516 L 75.434 9.078 L 76.373 9.078 L 76.373 16.518 L 75.434 16.518 Z M 80.769 16.516 L 79.827 16.516 L 79.827 10.006 L 77.786 10.006 L 77.786 9.076 L 82.964 9.076 L 82.964 10.005 L 80.926 10.005 C 80.769 10.005 80.769 16.514 80.769 16.514 L 80.769 16.517 Z M 92.692 15.586 C 91.907 16.362 90.965 16.671 89.867 16.671 C 88.769 16.671 87.826 16.36 87.044 15.586 C 86.258 14.809 85.945 13.881 85.945 12.794 C 85.945 11.71 86.258 10.778 87.043 10.005 C 87.825 9.229 88.766 8.919 89.864 8.919 C 90.962 8.919 91.905 9.23 92.688 10.005 C 93.472 10.781 93.786 11.71 93.786 12.796 C 93.786 13.882 93.473 14.812 92.687 15.587 L 92.692 15.587 Z M 87.827 14.966 C 88.453 15.586 89.083 15.742 89.868 15.742 C 90.652 15.742 91.279 15.429 91.907 14.966 C 92.533 14.346 92.849 13.727 92.849 12.796 C 92.849 11.865 92.536 11.247 92.064 10.626 C 91.438 10.006 90.808 9.85 90.023 9.85 C 89.239 9.85 88.612 10.163 87.985 10.626 C 87.359 11.247 87.201 11.865 87.201 12.798 C 87.201 13.728 87.358 14.35 87.827 14.968 Z M 95.202 16.516 L 95.202 9.078 L 96.458 9.078 L 100.067 14.812 L 100.067 9.078 L 101.006 9.078 L 101.006 16.518 L 100.067 16.518 L 96.297 10.472 L 96.297 16.518 L 95.202 16.518 Z M 85.789 27.369 C 82.809 27.369 80.455 29.54 80.455 32.64 C 80.455 35.742 82.809 37.91 85.788 37.91 C 88.768 37.91 91.122 35.742 91.122 32.64 C 91.122 29.54 88.769 27.369 85.789 27.369 Z M 85.789 35.894 C 84.22 35.894 82.809 34.501 82.809 32.64 C 82.809 30.781 84.22 29.385 85.788 29.385 C 87.358 29.385 88.768 30.624 88.768 32.64 C 88.768 34.501 87.358 35.894 85.788 35.894 Z M 74.18 27.369 C 71.2 27.369 68.846 29.54 68.846 32.64 C 68.846 35.742 71.199 37.91 74.178 37.91 C 77.159 37.91 79.513 35.742 79.513 32.64 C 79.513 29.54 77.004 27.369 74.18 27.369 Z M 74.18 35.894 C 72.61 35.894 71.2 34.501 71.2 32.64 C 71.2 30.781 72.61 29.385 74.18 29.385 C 75.748 29.385 77.159 30.624 77.159 32.64 C 77.159 34.501 75.748 35.894 74.18 35.894 Z M 60.218 28.922 L 60.218 31.09 L 65.707 31.09 C 65.551 32.329 65.081 33.26 64.453 33.881 C 63.668 34.658 62.412 35.586 60.218 35.586 C 56.922 35.586 54.255 32.95 54.255 29.695 C 54.255 26.44 56.922 23.804 60.218 23.804 C 61.944 23.804 63.356 24.424 64.296 25.354 L 65.865 23.804 C 64.454 22.565 62.728 21.478 60.219 21.478 C 55.669 21.478 51.745 25.199 51.745 29.695 C 51.745 34.192 55.512 37.911 60.218 37.911 C 62.728 37.911 64.612 37.135 66.023 35.586 C 67.591 34.034 67.904 32.019 67.904 30.316 C 67.904 29.85 67.904 29.385 67.748 28.92 L 60.217 28.92 L 60.219 28.922 Z M 117.009 30.781 C 116.54 29.541 115.286 27.369 112.46 27.369 C 109.637 27.369 107.44 29.54 107.44 32.64 C 107.44 35.586 109.637 37.91 112.773 37.91 C 115.286 37.91 116.696 36.361 117.168 35.586 L 115.286 34.347 C 114.657 35.276 113.873 35.742 112.619 35.742 C 111.362 35.742 110.579 35.276 110.108 34.189 L 117.321 31.247 C 117.321 31.403 117.008 30.784 117.008 30.784 Z M 109.794 32.486 C 109.794 30.47 111.362 29.383 112.617 29.383 C 113.559 29.383 114.344 29.849 114.657 30.469 C 114.501 30.469 109.794 32.486 109.794 32.486 Z M 103.989 37.601 L 106.342 37.601 L 106.342 22.099 L 103.989 22.099 Z M 100.226 28.609 C 99.6 27.988 98.656 27.369 97.4 27.369 C 94.734 27.369 92.224 29.694 92.224 32.64 C 92.224 35.585 94.734 37.91 97.4 37.91 C 98.656 37.91 99.754 37.29 100.226 36.67 L 100.382 36.67 L 100.382 37.447 C 100.382 39.462 99.282 40.546 97.557 40.546 C 96.145 40.546 95.203 39.46 94.89 38.685 L 92.85 39.461 C 93.477 40.854 95.047 42.56 97.557 42.56 C 100.381 42.56 102.577 41.008 102.577 37.132 L 102.577 27.68 L 100.381 27.68 L 100.381 28.61 Z M 97.4 35.894 C 95.832 35.894 94.421 34.5 94.421 32.64 C 94.421 30.779 95.832 29.385 97.4 29.385 C 98.969 29.385 100.226 30.779 100.226 32.64 C 100.382 34.5 99.127 35.894 97.4 35.894 Z M 127.994 22.099 L 122.347 22.099 L 122.347 37.601 L 124.698 37.601 L 124.698 31.711 L 127.994 31.711 C 130.661 31.711 133.172 29.85 133.172 26.904 C 133.172 23.959 130.661 22.099 127.994 22.099 Z M 128.151 29.539 L 124.857 29.539 L 124.857 24.268 L 128.151 24.268 C 129.876 24.268 130.974 25.663 130.974 26.904 C 130.817 28.143 129.876 29.54 128.151 29.54 Z M 142.585 27.368 C 140.857 27.368 139.132 28.144 138.348 29.694 L 140.388 30.624 C 140.858 29.694 141.643 29.539 142.585 29.539 C 143.839 29.539 145.093 30.315 145.093 31.554 L 145.093 31.709 C 144.621 31.399 143.838 31.088 142.583 31.088 C 140.386 31.088 138.033 32.328 138.033 34.5 C 138.033 36.515 139.917 37.909 141.956 37.909 C 143.525 37.909 144.466 37.132 144.936 36.359 L 145.093 36.359 L 145.093 37.598 L 147.29 37.598 L 147.29 31.711 C 147.29 28.919 145.249 27.369 142.582 27.369 Z M 142.272 35.893 C 141.486 35.893 140.388 35.585 140.388 34.654 C 140.388 33.414 141.643 32.949 142.898 32.949 C 143.996 32.949 144.466 33.104 145.093 33.414 C 144.936 34.81 143.681 35.893 142.269 35.893 Z M 155.606 27.678 L 152.94 34.345 L 152.782 34.345 L 149.957 27.678 L 147.447 27.678 L 151.681 37.135 L 149.327 42.251 L 151.837 42.251 L 158.269 27.68 L 155.603 27.68 Z M 134.426 37.601 L 136.78 37.601 L 136.78 22.099 L 134.426 22.099 Z M 13.307 9.693 C 12.994 10.004 12.68 10.624 12.68 11.399 L 12.68 38.84 C 12.68 39.615 12.836 40.235 13.307 40.545 L 13.464 40.7 L 28.997 25.353 L 28.997 25.042 Z M 34.173 30.47 L 28.997 25.354 L 28.997 25.043 L 34.173 19.928 L 34.331 19.928 L 40.449 23.338 C 42.175 24.268 42.175 25.975 40.449 26.905 Z M 34.33 30.47 L 28.997 25.2 L 13.307 40.701 C 13.934 41.322 14.876 41.322 15.974 40.701 Z M 34.33 19.926 L 15.974 9.693 C 14.876 9.073 13.934 9.229 13.307 9.848 L 28.995 25.351 Z" fill="transparent" height="50.07407407407407px" id="vaaK5_Liu" transform="translate(0 -0.035)" width="169px"><path d="M 0 0 L 169 0 L 169 50.074 L 0 50.074 Z" fill="transparent" height="50.07407407407407px" id="aD2VBgtwt" width="169px"/><path d="M 166.621 43.064 C 166.621 45.693 164.493 47.821 161.864 47.821 L 4.757 47.821 C 2.128 47.821 0 45.693 0 43.064 L 0 4.757 C 0 2.128 2.128 0 4.757 0 L 161.864 0 C 164.493 0 166.621 2.128 166.621 4.757 Z" fill="rgb(255, 255, 255)" height="47.82074074074074px" id="Ab_67gG3f" transform="translate(1.127 1.127)" width="166.62148148148148px"/><path d="M 162.991 50.074 L 5.884 50.074 C 2.629 50.074 0 47.445 0 44.19 L 0 5.884 C 0 2.629 2.629 0 5.884 0 L 162.991 0 C 166.246 0 168.875 2.629 168.875 5.884 L 168.875 44.065 C 168.875 47.445 166.246 50.074 162.991 50.074 Z" fill="rgb(255, 255, 255)" height="50.07407407407407px" id="RmrcNS5y4" width="168.8748148148148px"/><path d="M 166.621 43.064 C 166.621 45.693 164.493 47.821 161.864 47.821 L 4.757 47.821 C 2.128 47.821 0 45.693 0 43.064 L 0 4.757 C 0 2.128 2.128 0 4.757 0 L 161.864 0 C 164.493 0 166.621 2.128 166.621 4.757 Z" fill="rgb(0, 0, 0)" height="47.82074074074074px" id="NsywOLJoc" transform="translate(1.127 1.127)" width="166.62148148148148px"/><path d="M 7.688 4.187 C 7.688 5.273 7.375 6.048 6.746 6.666 C 5.961 7.442 5.178 7.751 3.922 7.751 C 2.823 7.751 1.882 7.441 1.098 6.666 C 0.314 5.89 0 4.961 0 3.874 C 0 2.789 0.313 1.859 1.098 1.085 C 1.883 0.309 2.823 0 3.922 0 C 4.391 0 5.02 0.155 5.491 0.31 C 5.961 0.466 6.432 0.774 6.746 1.087 L 6.12 1.705 C 5.648 1.085 4.862 0.775 4.08 0.775 C 3.294 0.775 2.666 1.085 2.038 1.551 C 1.412 2.171 1.099 2.79 1.099 3.721 C 1.099 4.652 1.412 5.273 2.038 5.892 C 2.666 6.512 3.294 6.669 4.079 6.669 C 4.862 6.669 5.648 6.358 6.119 5.892 C 6.432 5.582 6.745 4.964 6.745 4.343 L 4.079 4.343 L 4.079 3.413 L 7.688 3.413 L 7.688 4.189 Z M 13.492 1.087 L 10.04 1.087 L 10.04 3.413 L 13.178 3.413 L 13.178 4.343 L 10.04 4.343 L 10.04 6.667 L 13.492 6.667 L 13.492 7.597 L 9.098 7.597 L 9.098 0.158 L 13.492 0.158 Z M 17.57 7.596 L 16.631 7.596 L 16.631 1.087 L 14.59 1.087 L 14.59 0.156 L 19.768 0.156 L 19.768 1.085 L 17.727 1.085 L 17.727 7.595 L 17.571 7.597 Z M 23.376 7.596 L 23.376 0.159 L 24.315 0.159 L 24.315 7.599 L 23.376 7.599 Z M 28.711 7.596 L 27.769 7.596 L 27.769 1.087 L 25.728 1.087 L 25.728 0.156 L 30.906 0.156 L 30.906 1.085 L 28.868 1.085 C 28.711 1.085 28.711 7.595 28.711 7.595 L 28.711 7.597 Z M 40.634 6.666 C 39.849 7.442 38.906 7.751 37.808 7.751 C 36.711 7.751 35.768 7.441 34.986 6.666 C 34.199 5.89 33.886 4.961 33.886 3.874 C 33.886 2.79 34.199 1.859 34.984 1.085 C 35.767 0.309 36.708 0 37.806 0 C 38.904 0 39.846 0.31 40.63 1.085 C 41.414 1.862 41.728 2.79 41.728 3.877 C 41.728 4.962 41.415 5.892 40.629 6.667 L 40.634 6.667 Z M 35.769 6.046 C 36.395 6.666 37.025 6.823 37.81 6.823 C 38.593 6.823 39.221 6.51 39.849 6.046 C 40.475 5.427 40.79 4.807 40.79 3.877 C 40.79 2.946 40.477 2.327 40.005 1.706 C 39.379 1.087 38.75 0.93 37.965 0.93 C 37.181 0.93 36.554 1.243 35.927 1.706 C 35.301 2.327 35.143 2.946 35.143 3.878 C 35.143 4.808 35.3 5.431 35.769 6.049 Z M 43.144 7.596 L 43.144 0.159 L 44.399 0.159 L 48.009 5.892 L 48.009 0.159 L 48.947 0.159 L 48.947 7.599 L 48.009 7.599 L 44.239 1.552 L 44.239 7.599 L 43.144 7.599 Z" fill="rgb(255, 255, 255)" height="7.751466666666449px" id="N4zwlVic5" stroke-dasharray="" stroke-linecap="butt" stroke-linejoin="miter" stroke-miterlimit="10" stroke-width="0.13" stroke="rgb(255, 255, 255)" transform="translate(52.058 8.919)" width="48.947408756688304px"/><path d="M 34.044 5.891 C 31.063 5.891 28.71 8.062 28.71 11.162 C 28.71 14.264 31.063 16.432 34.043 16.432 C 37.022 16.432 39.377 14.264 39.377 11.162 C 39.377 8.062 37.024 5.891 34.044 5.891 Z M 34.044 14.416 C 32.474 14.416 31.063 13.023 31.063 11.162 C 31.063 9.303 32.474 7.907 34.043 7.907 C 35.613 7.907 37.022 9.146 37.022 11.162 C 37.022 13.023 35.613 14.416 34.043 14.416 Z M 22.434 5.891 C 19.455 5.891 17.1 8.062 17.1 11.162 C 17.1 14.264 19.454 16.432 22.433 16.432 C 25.414 16.432 27.767 14.264 27.767 11.162 C 27.767 8.062 25.259 5.891 22.434 5.891 Z M 22.434 14.416 C 20.865 14.416 19.455 13.023 19.455 11.162 C 19.455 9.303 20.865 7.907 22.434 7.907 C 24.003 7.907 25.414 9.146 25.414 11.162 C 25.414 13.023 24.003 14.416 22.434 14.416 Z M 8.473 7.444 L 8.473 9.612 L 13.962 9.612 C 13.805 10.851 13.336 11.782 12.708 12.403 C 11.923 13.179 10.667 14.108 8.473 14.108 C 5.176 14.108 2.51 11.472 2.51 8.217 C 2.51 4.962 5.176 2.326 8.473 2.326 C 10.199 2.326 11.611 2.946 12.551 3.876 L 14.12 2.326 C 12.709 1.087 10.982 0 8.474 0 C 3.923 0 0 3.721 0 8.217 C 0 12.714 3.767 16.433 8.473 16.433 C 10.982 16.433 12.867 15.657 14.277 14.108 C 15.846 12.556 16.159 10.541 16.159 8.838 C 16.159 8.372 16.159 7.907 16.002 7.442 L 8.471 7.442 L 8.474 7.444 Z M 65.264 9.303 C 64.795 8.063 63.54 5.891 60.715 5.891 C 57.892 5.891 55.695 8.062 55.695 11.162 C 55.695 14.108 57.892 16.432 61.028 16.432 C 63.54 16.432 64.951 14.883 65.423 14.108 L 63.54 12.869 C 62.912 13.798 62.128 14.264 60.874 14.264 C 59.617 14.264 58.833 13.798 58.363 12.711 L 65.576 9.769 C 65.576 9.925 65.263 9.306 65.263 9.306 Z M 58.048 11.008 C 58.048 8.992 59.617 7.905 60.871 7.905 C 61.814 7.905 62.599 8.371 62.912 8.991 C 62.755 8.991 58.048 11.008 58.048 11.008 Z M 52.244 16.123 L 54.597 16.123 L 54.597 0.621 L 52.244 0.621 Z M 48.48 7.131 C 47.855 6.51 46.911 5.891 45.655 5.891 C 42.989 5.891 40.479 8.216 40.479 11.162 C 40.479 14.107 42.989 16.432 45.655 16.432 C 46.911 16.432 48.009 15.812 48.48 15.192 L 48.637 15.192 L 48.637 15.969 C 48.637 17.984 47.537 19.068 45.812 19.068 C 44.399 19.068 43.458 17.982 43.145 17.207 L 41.105 17.983 C 41.732 19.376 43.302 21.082 45.812 21.082 C 48.636 21.082 50.831 19.53 50.831 15.654 L 50.831 6.202 L 48.636 6.202 L 48.636 7.132 Z M 45.655 14.416 C 44.086 14.416 42.676 13.022 42.676 11.162 C 42.676 9.301 44.086 7.907 45.655 7.907 C 47.224 7.907 48.48 9.301 48.48 11.162 C 48.637 13.022 47.381 14.416 45.655 14.416 Z M 76.249 0.621 L 70.602 0.621 L 70.602 16.123 L 72.953 16.123 L 72.953 10.233 L 76.249 10.233 C 78.915 10.233 81.427 8.372 81.427 5.426 C 81.427 2.481 78.915 0.621 76.249 0.621 Z M 76.406 8.061 L 73.112 8.061 L 73.112 2.79 L 76.406 2.79 C 78.131 2.79 79.228 4.185 79.228 5.426 C 79.072 6.665 78.131 8.062 76.406 8.062 Z M 90.839 5.89 C 89.112 5.89 87.387 6.666 86.603 8.216 L 88.642 9.146 C 89.113 8.216 89.898 8.061 90.839 8.061 C 92.094 8.061 93.348 8.837 93.348 10.076 L 93.348 10.231 C 92.876 9.921 92.092 9.61 90.838 9.61 C 88.641 9.61 86.288 10.85 86.288 13.022 C 86.288 15.037 88.172 16.431 90.211 16.431 C 91.78 16.431 92.721 15.654 93.19 14.881 L 93.348 14.881 L 93.348 16.12 L 95.545 16.12 L 95.545 10.233 C 95.545 7.441 93.503 5.891 90.837 5.891 Z M 90.526 14.415 C 89.74 14.415 88.642 14.107 88.642 13.176 C 88.642 11.936 89.898 11.471 91.152 11.471 C 92.25 11.471 92.721 11.626 93.348 11.936 C 93.19 13.332 91.936 14.415 90.524 14.415 Z M 103.861 6.2 L 101.195 12.867 L 101.037 12.867 L 98.212 6.2 L 95.702 6.2 L 99.935 15.657 L 97.582 20.773 L 100.092 20.773 L 106.524 6.202 L 103.857 6.202 Z M 82.681 16.123 L 85.035 16.123 L 85.035 0.621 L 82.681 0.621 Z" fill="rgb(255, 255, 255)" height="21.082436980380677px" id="tfEIQsE7g" transform="translate(51.745 21.478)" width="106.52381965223503px"/><path d="M 0.627 0 C 0.314 0.31 0 0.931 0 1.706 L 0 29.147 C 0 29.922 0.156 30.541 0.627 30.852 L 0.784 31.007 L 16.317 15.659 L 16.317 15.349 Z" fill="url(%23lO9ZKOSbU-145616319-linear-gradient)" height="31.00711851851881px" id="lO9ZKOSbU" transform="translate(12.68 9.693)" width="16.316637037037054px"/><path d="M 5.176 10.542 L 0 5.426 L 0 5.115 L 5.176 0 L 5.334 0 L 11.452 3.41 C 13.178 4.34 13.178 6.046 11.452 6.977 Z" fill="url(%23AHSAx3S8X-145616319-linear-gradient)" height="10.541844444444337px" id="AHSAx3S8X" transform="translate(28.997 19.928)" width="12.746668518518579px"/><path d="M 21.022 5.27 L 15.689 0 L 0 15.502 C 0.627 16.123 1.569 16.123 2.666 15.502 Z" fill="url(%23lT_CwMzJX-145616319-linear-gradient)" height="15.967370370370507px" id="lT_CwMzJX" transform="translate(13.307 25.2)" width="21.022348148148183px"/><path d="M 21.022 10.627 L 2.666 0.394 C 1.569 -0.225 0.627 -0.07 0 0.55 L 15.688 16.053 Z" fill="url(%23G8Xc3Q46D-145616319-linear-gradient)" height="16.052514720953415px" id="G8Xc3Q46D" transform="translate(13.307 9.299)" width="21.022348148148183px"/></g></svg>)
" height="64px" id="GPZSE4T0D" width="64px"/><g d="M 24.773 27.826 L 63.458 27.826 C 61.413 12.125 47.987 0 31.729 0 C 29.34 0 27.012 0.264 24.772 0.761 L 24.772 27.826 Z M 16.425 27.826 L 16.425 3.891 C 7.638 8.685 1.348 17.479 0 27.826 L 16.425 27.826 Z M 16.425 36.174 L 0 36.174 C 1.348 46.521 7.638 55.315 16.425 60.109 Z M 24.772 36.174 L 24.772 63.239 C 27.012 63.736 29.34 64 31.729 64 C 47.987 64 61.413 51.875 63.458 36.174 L 24.772 36.174 Z" fill="transparent" height="64.00000142211914px" id="oUIhbHR9D" transform="translate(0.271 0)" width="63.458091455078126px"><path d="M 0 27.826 L 38.686 27.826 C 36.64 12.125 23.215 0 6.957 0 C 4.567 0 2.24 0.264 0 0.761 L 0 27.826 Z" fill="rgb(216, 0, 39)" height="27.8261px" id="Ix3cB_CqS" transform="translate(24.772 0)" width="38.6856px"/><path d="M 16.425 23.935 L 16.425 0 C 7.638 4.794 1.348 13.588 0 23.935 L 16.425 23.935 Z" fill="rgb(216, 0, 39)" height="23.93528px" id="TlUem_rjt" transform="translate(0 3.891)" width="16.424792px"/><path d="M 16.425 0 L 0 0 C 1.348 10.347 7.638 19.141 16.425 23.935 Z" fill="rgb(216, 0, 39)" height="23.935200000000002px" id="gRcaysf0v" transform="translate(0 36.174)" width="16.424792px"/><path d="M 0 0 L 0 27.066 C 2.24 27.562 4.567 27.826 6.957 27.826 C 23.215 27.826 36.64 15.701 38.686 0 L 0 0 Z" fill="rgb(216, 0, 39)" height="27.8262px" id="k3tAG5oEh" transform="translate(24.772 36.174)" width="38.6856px"/></g></g></svg>)
" height="64px" id="sLuOK1CTC" width="64px"/><path d="M 63.729 27.065 L 25.044 27.065 L 25.044 27.065 L 25.044 0 C 22.086 0.656 19.283 1.719 16.696 3.13 L 16.696 27.065 L 16.696 27.065 L 0.271 27.065 C 0.093 28.432 0 29.825 0 31.239 C 0 32.654 0.093 34.047 0.271 35.413 L 16.695 35.413 L 16.696 35.413 L 16.696 59.348 C 19.283 60.76 22.086 61.823 25.044 62.479 L 25.044 35.414 L 25.044 35.413 L 63.729 35.413 C 63.907 34.047 64 32.654 64 31.239 C 64 29.825 63.907 28.432 63.729 27.065 Z" fill="rgb(0, 82, 180)" height="62.478658px" id="ZLoDJHYeS" transform="translate(0 0.761)" width="64px"/></g></svg>)
" height="64px" id="klpemhJhU" width="64px"/><g d="M 0 40.348 C 1.851 47.217 5.932 53.172 11.419 57.388 L 11.419 40.348 Z M 28.115 63.878 C 29.032 63.957 29.96 64 30.898 64 C 45.683 64 58.123 53.972 61.795 40.348 L 28.115 40.348 Z M 61.795 23.652 C 58.123 10.028 45.683 0 30.898 0 C 29.96 0 29.032 0.043 28.115 0.122 L 28.115 23.652 Z M 11.419 6.611 C 5.932 10.828 1.851 16.782 0 23.652 L 11.419 23.652 Z" fill="transparent" height="63.99979821166992px" id="Vz12bFiGT" transform="translate(1.103 0)" width="61.79545917053223px"><path d="M 0 0 C 1.851 6.87 5.932 12.824 11.419 17.04 L 11.419 0 Z" fill="rgb(0, 82, 180)" height="17.0402px" id="pSZpYn0mE" transform="translate(0 40.348)" width="11.419360000000001px"/><path d="M 0 23.53 C 0.917 23.609 1.845 23.652 2.783 23.652 C 17.567 23.652 30.008 13.624 33.68 0 L 0 0 Z" fill="rgb(0, 82, 180)" height="23.652099999999997px" id="v5ZlEOEn1" transform="translate(28.115 40.348)" width="33.680200000000006px"/><path d="M 33.68 23.652 C 30.008 10.028 17.567 0 2.783 0 C 1.845 0 0.917 0.043 0 0.122 L 0 23.652 Z" fill="rgb(0, 82, 180)" height="23.6521px" id="Gov_xNsZR" transform="translate(28.115 0)" width="33.680200000000006px"/><path d="M 11.419 0 C 5.932 4.216 1.851 10.17 0 17.04 L 11.419 17.04 Z" fill="rgb(0, 82, 180)" height="17.04027px" id="zNz5saJzu" transform="translate(0 6.611)" width="11.419360000000001px"/></g><path d="M 63.729 27.065 L 25.044 27.065 L 25.044 27.065 L 25.044 0 C 22.086 0.656 19.283 1.719 16.696 3.13 L 16.696 27.065 L 0.271 27.065 C 0.093 28.432 0 29.825 0 31.239 C 0 32.654 0.093 34.047 0.271 35.413 L 16.695 35.413 L 16.696 35.413 L 16.696 59.348 C 19.283 60.76 22.086 61.823 25.044 62.479 L 25.044 35.414 L 25.044 35.413 L 63.729 35.413 C 63.907 34.047 64 32.654 64 31.239 C 64 29.825 63.907 28.432 63.729 27.065 Z" fill="rgb(216, 0, 39)" height="62.478658px" id="tZ8tqVLHV" transform="translate(0 0.761)" width="64px"/></g></svg>)
" height="64px" id="ivJUHNyzo" width="64px"/><g d="M 30.898 0 C 16.113 0 3.672 10.028 0 23.652 L 61.795 23.652 C 58.123 10.028 45.682 0 30.898 0 Z M 30.898 64 C 45.682 64 58.123 53.972 61.795 40.348 L 0 40.348 C 3.672 53.972 16.113 64 30.898 64 Z" fill="transparent" height="63.99979821166992px" id="L_VhgJiTE" transform="translate(1.103 0)" width="61.79536px"><path d="M 30.898 0 C 16.113 0 3.672 10.028 0 23.652 L 61.795 23.652 C 58.123 10.028 45.682 0 30.898 0 Z" fill="rgb(162, 0, 29)" height="23.6521px" id="oSlkiGZoe" width="61.79536px"/><path d="M 30.898 23.652 C 45.682 23.652 58.123 13.624 61.795 0 L 0 0 C 3.672 13.624 16.113 23.652 30.898 23.652 Z" fill="rgb(162, 0, 29)" height="23.652099999999997px" id="AIn_HurBC" transform="translate(0 40.348)" width="61.79526px"/></g></g></svg>)
" height="27.826px" id="PR14FPsVM" transform="translate(0 18.087)" width="64px"/><path d="M 60.019 20.87 C 55.498 8.684 43.768 0 30.01 0 C 16.251 0 4.521 8.684 0 20.87 Z" fill="rgb(255, 218, 68)" height="20.8696px" id="jHZ48Q8zf" transform="translate(1.99 0)" width="60.019270000000006px"/><path d="M 30.01 20.87 C 43.768 20.87 55.498 12.186 60.019 0 L 0 0 C 4.521 12.186 16.251 20.87 30.01 20.87 Z" fill="rgb(216, 0, 39)" height="20.869600000000005px" id="wgzm4Bu7Z" transform="translate(1.99 43.131)" width="60.019270000000006px"/></g></svg>)
" height="64px" id="Pcg69hNGx" width="64px"/><g d="M 0 40.348 C 1.851 47.217 5.932 53.172 11.419 57.388 L 11.419 40.348 Z M 28.115 63.878 C 29.032 63.957 29.96 64 30.898 64 C 45.683 64 58.123 53.972 61.795 40.348 L 28.115 40.348 Z M 61.795 23.652 C 58.123 10.028 45.683 0 30.898 0 C 29.96 0 29.032 0.043 28.115 0.122 L 28.115 23.652 Z M 11.419 6.611 C 5.932 10.828 1.851 16.782 0 23.652 L 11.419 23.652 Z" fill="transparent" height="63.99979821166992px" id="Qbn8pTIDE" transform="translate(1.103 0)" width="61.79545917053223px"><path d="M 0 0 C 1.851 6.87 5.932 12.824 11.419 17.04 L 11.419 0 Z" fill="rgb(216, 0, 39)" height="17.0402px" id="XRTmhWaq1" transform="translate(0 40.348)" width="11.419360000000001px"/><path d="M 0 23.53 C 0.917 23.609 1.845 23.652 2.783 23.652 C 17.567 23.652 30.008 13.624 33.68 0 L 0 0 Z" fill="rgb(216, 0, 39)" height="23.652099999999997px" id="ywy7oNhZ9" transform="translate(28.115 40.348)" width="33.680200000000006px"/><path d="M 33.68 23.652 C 30.008 10.028 17.567 0 2.783 0 C 1.845 0 0.917 0.043 0 0.122 L 0 23.652 Z" fill="rgb(216, 0, 39)" height="23.6521px" id="UDLKKCSas" transform="translate(28.115 0)" width="33.680200000000006px"/><path d="M 11.419 0 C 5.932 4.216 1.851 10.17 0 17.04 L 11.419 17.04 Z" fill="rgb(216, 0, 39)" height="17.04027px" id="fUwhFMXu0" transform="translate(0 6.611)" width="11.419360000000001px"/></g><path d="M 63.729 27.065 L 25.044 27.065 L 25.044 27.065 L 25.044 0 C 22.086 0.656 19.283 1.719 16.696 3.13 L 16.696 27.065 L 16.696 27.065 L 0.271 27.065 C 0.093 28.432 0 29.825 0 31.239 C 0 32.654 0.093 34.047 0.271 35.413 L 16.695 35.413 L 16.696 35.413 L 16.696 59.348 C 19.283 60.76 22.086 61.823 25.044 62.479 L 25.044 35.414 L 25.044 35.413 L 63.729 35.413 C 63.907 34.047 64 32.654 64 31.239 C 64 29.825 63.907 28.432 63.729 27.065 Z" fill="rgb(0, 82, 180)" height="62.478658px" id="ygxQC8hjC" transform="translate(0 0.761)" width="64px"/></g></svg>)
" height="64px" id="DgMeO6s6S" width="64px"/><path d="M 64 0 C 64 17.673 49.673 32 32 32 C 14.327 32 0 17.673 0 0" fill="rgb(216, 0, 39)" height="32px" id="idtoqfOS5" transform="translate(0 32)" width="64px"/></g></svg>)
" width="64.000034px"><path d="M 0 64 L 0 0 L 64 0 L 64 64 Z" fill="transparent" height="64px" id="DbB0V6zWO" transform="translate(0 0.947)" width="64px"/><path d="M 32 64 C 49.673 64 64 49.673 64 32 C 64 14.327 49.673 0 32 0 C 14.327 0 0 14.327 0 32 C 0 49.673 14.327 64 32 64 Z" fill="rgb(255, 218, 68)" height="64px" id="OH_RYf7ki" transform="translate(0 0)" width="64.000034px"/><g d="M 24.773 27.826 L 63.458 27.826 C 61.413 12.125 47.987 0 31.729 0 C 29.34 0 27.012 0.264 24.772 0.761 L 24.772 27.826 Z M 16.425 27.826 L 16.425 3.891 C 7.638 8.685 1.348 17.479 0 27.826 L 16.425 27.826 Z M 16.425 36.174 L 0 36.174 C 1.348 46.521 7.638 55.315 16.425 60.109 Z M 24.772 36.174 L 24.772 63.239 C 27.012 63.736 29.34 64 31.729 64 C 47.987 64 61.413 51.875 63.458 36.174 L 24.772 36.174 Z" fill="transparent" height="64.00000142211914px" id="Ig9wyvZ5Q" transform="translate(0.271 0)" width="63.45813041992187px"><path d="M 0 27.826 L 38.686 27.826 C 36.64 12.125 23.215 0 6.956 0 C 4.567 0 2.24 0.264 0 0.761 L 0 27.826 Z" fill="rgb(0, 82, 180)" height="27.8261px" id="yn0jvNW9f" transform="translate(24.772 0)" width="38.6857px"/><path d="M 16.425 23.935 L 16.425 0 C 7.638 4.794 1.348 13.588 0 23.935 L 16.425 23.935 Z" fill="rgb(0, 82, 180)" height="23.93528px" id="Ie4qmbb8e" transform="translate(0 3.891)" width="16.424729999999997px"/><path d="M 16.425 0 L 0 0 C 1.348 10.347 7.638 19.141 16.425 23.935 Z" fill="rgb(0, 82, 180)" height="23.935200000000002px" id="PLE_VT_Ox" transform="translate(0 36.174)" width="16.424729999999997px"/><path d="M 0 0 L 0 27.066 C 2.24 27.562 4.567 27.826 6.956 27.826 C 23.215 27.826 36.64 15.701 38.686 0 L 0 0 Z" fill="rgb(0, 82, 180)" height="27.8262px" id="u1LrQsH8U" transform="translate(24.772 36.174)" width="38.6857px"/></g></g></svg>)